Tuesday, 6 December 2011

Walk through (part 3, Animation)


For the first section of animation I worked from camera_1 (frozen). I did a basic walk cycle down the stairs, keying the key frames. I made sure that as he took a step his shoulders would rise and fall, and his wrists would swing a little. I also made his back hunch and relax slightly with each step, conveying that he was creeping around. I also made him look about for possible threats.


For the second section, I key framed camera_2 so that it would pan and zoom in on norman from a low angle while he looked around. I kept his spine hunched and his body movements slow to show he was still creeping about.

As the Dog lands, he jumps up in surprise and extends his hands, screaming. he then falls back into a cower before realizing its just a dog, not a ghost or monster.
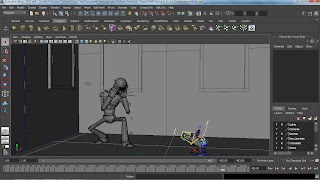


I then made him kneel down as the dog settles and realization dawns on him. i made his hands cup his face and show adoration/ affection to the dog, pursing his lips in a sort of "kissy face" as he coos to the animal.

The dog then speaks.
Yet again it takes a few moments for norman to realize what happened, then he leaps up screaming and runs away in an over exaggerated motion, his arms providing a good follow through to his movements.

Walk through (part 2)


For the doors and picture frames I created a rectangular polygon, then added several edge loops using the edge loop tool. I then extruded several of the faces to create the appearance that I needed for them. I then duplicated them to place them around the building.


For the chandelier, I used the CV curve tool to draw each separate part, then used the revolve surface tool (then deleting the history). I then duplicated the separate parts then turned the rotated surface to a polygon. I then assembled the chandelier. Finally, I duplicated the object and placed it further along the hallway.


I then began to texture my layout.
Firstly, I gave my surface either a lambert or blinn surface in the hypershade, depending on whether or not I wanted it to stay mat (lambert, used for wood, rock ect) or be slightly shiny (blinn, used for picture frames, doors, chandelier, metal.)
I then added the checkers to my object to make sure that the surface was unfolded correctly. then, I moved into the UV editor where I unfolded my objects and sewed the necessary edges back together, checking to make sure the surfaces where facing the necessary direction. I then took a snapshot, which I opened in photoshop and painted my textures too. I then back in the hypershade added the painted textures to the polygons by adding a file to the lamberts / blinns and onto the objects.


I then added point lights for each of the lights on my chandelier, changing the light colour to green to contrast the red carpet and give the room a horrific ambiance. Finally, to light up the scene a little I added an ambient light, again a green yellow for the required appearance of my scene.


Afterwards I added the cameras, freezing camera_1 as I didn't need to animate this one throughout.


throughout all this I created a layer for each group of objects, so that my scene was neat and tidy and organized and that I could edit each and not have to worry about damaging anything else in the process.

Walk through (part 1)


The first thing I did was import the character norman so that I could build my layout around him and make sure that everything was created to scale so that the character interaction looked as realistic as possible.


I then built the walls and floor around him using the create polygon surface tool. to create the walls I used the extrude edge tool, and added sub divides to then extend the surface to make the upper floors and outcrops in the walls. Finally, I deleted the polygons that the camera wouldn't see, making it easier to texture when the time came and saving myself valuable time.


To create the stairs, I created a polygon the correct shape and size for the first step, then froze the transformations. I then duplicated the stair and moved it to create the second step, noting the changed values. I then went into the duplicate special tool and added the changed values and number of steps I required to create the rest of the staircase. I then extruded the bottom face of the stairs to create the side off the steps, then finally went around and deleted the faces that the camera wouldn't see.


To create the banisters, I drew a CV curve, then used the revolve surface tool to create them (then deleting the history). Then I turned the revolved surface to a polygon.


I then did the same thing as when I created the stairs. I froze the transformations of the banister, then duplicated, noting the change in values. I then duplicated special and added the altered values to create the banisters up the stairs, then did the same for the banisters running along the landing.


For the railings, I added simple rectangular polygons, and for the curves between the different polygons I used the bridge tool.
this was done by selecting both polygons and making them one object, then selecting the two faces that I wanted to join and using the bridge tool (also adding the values of how many subdivides I wanted) I joined the two faces. This was also the method I used to join between the curved railings at the bottom of the stairs.

Mind maps for layout


Sunday, 4 December 2011

Layout Design


I decided to create a hallway instead of a simple room as I thought that a staircase would help create the scary atmosphere i would need for my animation.
I will use mainly green / yellow lighting to help create the erie tone needed for my scenes, and reds to add a stark contrast to green.
The monster itself may not work in my layout as I'm unable to find a rig for it, so I may replace it with a dog or cat, who then talks to startle my norman rig.

Thursday, 17 November 2011

Animatic Updated

Thursday, 10 November 2011

Bounce test

Wednesday, 2 November 2011

Animatic 1

Monday, 31 October 2011

Textures (Wall stone work)

Wall textures:
I would preffer to use stone work, but some of the marble images look as though they would work well also.


Sunday, 30 October 2011

Maya Process (before UV mapping)


Image one: I created a flat plane, then dissected the plane into separate sub devisions, extruding some and leaving others till I had the basic shape and size of my room. I left the roof clear and one side of the room so that it would be easier to work in.

Image two: I created my chandelier in three separate pieces all using the revolve curve tool. I first drew out each individual shape, then rotated to get the object I needed. I then used a curve and extruded along it to connect the parts to the center of the chandelier.

Image Three: For this stage I created polygon cubes, made them to my desired size and thickness, then used the edge loop tool to create subdivides by which I could extrude to get the desired overall beveled appearance of doors and picture frames.

Image Four: For the steps, I used the polygon cube tool to create the first step, then set that as the center. I then used the duplicate tool to create another step and move it to where I wanted. When I was satisfied with the placement, I then used the special duplicate tool to continue the rotation and duplications of the stairs, then extruded the underneath to create a wall.

Image Five: for the banisters, I used the rotate curve tool, drawing the curve myself then rotating the image to give it the necessary appearance. I then also used the duplicate special tool to get equal distances between banisters.

Image Six: For the railings, I used the polly cubes tool and to create the links between objects I used the bridge tool, this also made my desired wavy railings on my staircase.

Thursday, 6 October 2011

Milo Run Animation Test

Basic loop animation of my character Milo (The Manticore) Running.
Just a test to keep myself used to drawing on the computer and to help me learn the squash and stretch of the feline spine while running.
That and animation with human arms replacing feline front legs was a little challenge I set myself.

Monday, 3 October 2011

Createing Candles


One of my first attempts at maya for this project, I have begun work on my chandeller.
By starting with the basics, I've created a curve by going Create -> EP Curve to match the shape of my ornate object, then used Surface -> Revolve to create the base, the candle and the wick.

Brief details

- Mind map ( )
- Show insperation / Ideas for layout (x)
- Show insperation / ideas for characters (x)
- Sketch thumbnails (x)
- Final sketch (x)
- Colour keys (x)
- Props presant / Detailed sketch of props ( )
- Story board of the character in the enviroment ( )
- Lighting ( )

Key:
( ) Not done / In progress
(x) Finsihed

Friday, 30 September 2011

Layout research part 2

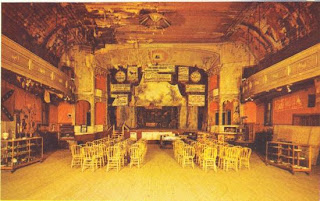
It's also a common factor to have a grand piano or a huge fire place as pride of place in such homes. I will look into using these within my own designs.


Most stately horror homes seem to have towers and are made from old stonework, something I will aim to include with my own Interior.

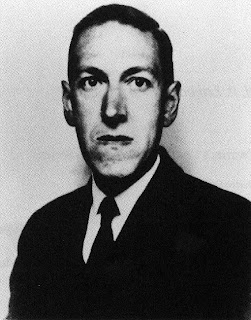
I have decided that the most interesting layout I could achieve would be something that could be portrayed as comical as well as have darker undertones, as well as a dedication to one of the most brilliant horror writers of all time, H.P. Lovecraft.
Lovecrafts work mainly followed the assumption that as well as our world, there are many others like it harboring beings that have the ability to cross over into ours and reek havoc with our minds through the power of hypnosis, dream interference, and simply terrifying us beyond rational thought. These creatures where often referred to as 'the old gods', or in other cases, 'the old creatures'.
Lovecraft himself was said to have dabbled in this 'fringe science' of crossing worlds, and so i thought I could use this aspect to put a twist on our imaginings of a hunted stately homes interior after an 'old god' has crossed into our world.
Of course, I also want this to have a comical side to it when I introduce characters into the layout, and plan on using the norman rig to portray lovecraft himself, but in a much more cartoon style, and as such want my layout to also resemble a cartoon horror house.

Layout reserch


Newer Posts Home