Tuesday, 6 December 2011

Walk through (part 3, Animation)


For the first section of animation I worked from camera_1 (frozen). I did a basic walk cycle down the stairs, keying the key frames. I made sure that as he took a step his shoulders would rise and fall, and his wrists would swing a little. I also made his back hunch and relax slightly with each step, conveying that he was creeping around. I also made him look about for possible threats.


For the second section, I key framed camera_2 so that it would pan and zoom in on norman from a low angle while he looked around. I kept his spine hunched and his body movements slow to show he was still creeping about.

As the Dog lands, he jumps up in surprise and extends his hands, screaming. he then falls back into a cower before realizing its just a dog, not a ghost or monster.
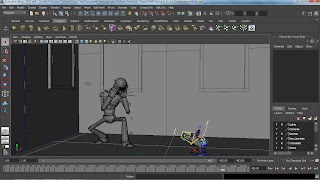


I then made him kneel down as the dog settles and realization dawns on him. i made his hands cup his face and show adoration/ affection to the dog, pursing his lips in a sort of "kissy face" as he coos to the animal.

The dog then speaks.
Yet again it takes a few moments for norman to realize what happened, then he leaps up screaming and runs away in an over exaggerated motion, his arms providing a good follow through to his movements.

Walk through (part 2)


For the doors and picture frames I created a rectangular polygon, then added several edge loops using the edge loop tool. I then extruded several of the faces to create the appearance that I needed for them. I then duplicated them to place them around the building.


For the chandelier, I used the CV curve tool to draw each separate part, then used the revolve surface tool (then deleting the history). I then duplicated the separate parts then turned the rotated surface to a polygon. I then assembled the chandelier. Finally, I duplicated the object and placed it further along the hallway.


I then began to texture my layout.
Firstly, I gave my surface either a lambert or blinn surface in the hypershade, depending on whether or not I wanted it to stay mat (lambert, used for wood, rock ect) or be slightly shiny (blinn, used for picture frames, doors, chandelier, metal.)
I then added the checkers to my object to make sure that the surface was unfolded correctly. then, I moved into the UV editor where I unfolded my objects and sewed the necessary edges back together, checking to make sure the surfaces where facing the necessary direction. I then took a snapshot, which I opened in photoshop and painted my textures too. I then back in the hypershade added the painted textures to the polygons by adding a file to the lamberts / blinns and onto the objects.


I then added point lights for each of the lights on my chandelier, changing the light colour to green to contrast the red carpet and give the room a horrific ambiance. Finally, to light up the scene a little I added an ambient light, again a green yellow for the required appearance of my scene.


Afterwards I added the cameras, freezing camera_1 as I didn't need to animate this one throughout.


throughout all this I created a layer for each group of objects, so that my scene was neat and tidy and organized and that I could edit each and not have to worry about damaging anything else in the process.

Walk through (part 1)


The first thing I did was import the character norman so that I could build my layout around him and make sure that everything was created to scale so that the character interaction looked as realistic as possible.


I then built the walls and floor around him using the create polygon surface tool. to create the walls I used the extrude edge tool, and added sub divides to then extend the surface to make the upper floors and outcrops in the walls. Finally, I deleted the polygons that the camera wouldn't see, making it easier to texture when the time came and saving myself valuable time.


To create the stairs, I created a polygon the correct shape and size for the first step, then froze the transformations. I then duplicated the stair and moved it to create the second step, noting the changed values. I then went into the duplicate special tool and added the changed values and number of steps I required to create the rest of the staircase. I then extruded the bottom face of the stairs to create the side off the steps, then finally went around and deleted the faces that the camera wouldn't see.


To create the banisters, I drew a CV curve, then used the revolve surface tool to create them (then deleting the history). Then I turned the revolved surface to a polygon.


I then did the same thing as when I created the stairs. I froze the transformations of the banister, then duplicated, noting the change in values. I then duplicated special and added the altered values to create the banisters up the stairs, then did the same for the banisters running along the landing.


For the railings, I added simple rectangular polygons, and for the curves between the different polygons I used the bridge tool.
this was done by selecting both polygons and making them one object, then selecting the two faces that I wanted to join and using the bridge tool (also adding the values of how many subdivides I wanted) I joined the two faces. This was also the method I used to join between the curved railings at the bottom of the stairs.

Mind maps for layout


Sunday, 4 December 2011

Layout Design


I decided to create a hallway instead of a simple room as I thought that a staircase would help create the scary atmosphere i would need for my animation.
I will use mainly green / yellow lighting to help create the erie tone needed for my scenes, and reds to add a stark contrast to green.
The monster itself may not work in my layout as I'm unable to find a rig for it, so I may replace it with a dog or cat, who then talks to startle my norman rig.

Newer Posts Older Posts Home

Blogger Template by Blogcrowds